After the recent cold spell, as the weather starts to improve, you might be thinking about your plans for the garden so now is the best them to start buying or gathering seeds.
Below is a handy guide for using seeds to grow anything from plants to fruit and vegetables.
- First of all read the back of the seed packet, as some seeds need differing sowing conditions.
- Everything you need to know about growing the plant is on the back of the packet.
- Some seed packets contain hundreds of seeds so don’t sow more than you are likely to use; most packets will tell you the number of seeds it contains.
- Cut the cost by sharing packets with neighbours.
- Store unused seed in a sealed plastic container in the fridge.
- Test the viability of old seeds by placing in some water for a couple of hours; fertile seeds will sink. This is not an infallible test as it sometimes doesn’t work with smaller seeds.
- Salad leaves will grow quite easily on a warm, sunny kitchen windowsill, just sow at 3 week intervals so that you have a continuous supply.
- The majority of seeds are sown between February and April; but some, such as brassicas or broad beans, can be sown in autumn to get an earlier crop in spring.
- Large seeds such as peas and beans can be grown on damp kitchen paper on the windowsill and are a great introduction to get children into gardening.
- Most seed companies do a range of flowers and mini vegetables designed to attract children to gardening.
Equipment
- Seed trays
- Seed compost; use a dedicated compost not ordinary multi-purpose as the fibres are too large for the delicate shoots to push past. You can just use Vermiculite or a mixture of Vermiculite and Perlite; as they are a sterile medium you are less likely to get botrytis.
- Labels
- Heated propagator
- Trowel
- Large waterproof tray to water the compost in the seed tray
- Sieve
- Rake; if sowing outdoors
Preparation
Indoors
- Buy new seed trays or if using old ones scrub clean with a weak, 10%, bleach solution and allow to dry.
- Assemble all the things you are going to need.
Outdoors
- Rake the soil to resemble fine breadcrumbs.
Sowing
Indoors
- Fill the seed tray with the compost to within 1cm of the top and tap it lightly on the bench to settle the compost and get rid of any air pockets.
- Incorporate some Vermiculite and Perlite into the compost to improve heat retention and drainage; which prevents the soil becoming compacted.
- Sow the seed sparsely, if the seedlings are too crammed together it increases the risk of Botrytis cinerea (grey mould).
- Sow large seeds such as peas and beans in individual cells.
- Cover with a slight sprinkling of sieved compost or Vermiculite; very small seeds often don’t need covering.
- Dampen the compost after sowing the seed by standing the tray into lukewarm water until it is damp, about 5 – 10 minutes. The compost changes colour when it is wet. Always water from below to avoid washing the seed into clumps.
- Label the tray.
- Seeds germinate best at a temperature of 18 – 24C (65 – 75F); so for some of the fussier ones, such as tomatoes, chillies and peppers, you will need a heated propagator.
- You can place the seeds in the tray inside a plastic bag, which makes a more stable environment, but remove as soon as they start to germinate.
- Some seeds in the wild need specific conditions in order to trigger germination, such as fire or frost, so you may have to mimic these conditions by placing in some damp compost in the freezer, soaking in water or rubbing with sand paper.
- The rate of germination can vary but is usually from 7 – 21 days; however some can take months. The seed of tree paeonies can take 2 – 3 years to germinate and a further 5 years to flower.
Outdoors
- Seeds sown directly into the soil once it has warmed and all danger of frost is passed are usually the large seeds, carrots, turnips, parsnips, radish, salad crops and flowering annuals.
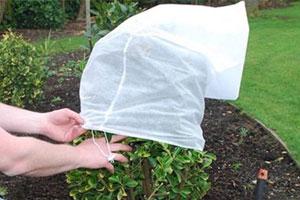
- If you sow early or there is a threat of frost cover with a poly or fleece cloche.
- Sow the seed thinly and cover with a slight sprinkling of sieved garden soil, or if sowing in rows just make a groove with the edge of the rake and push the soil back over the seeds.
Aftercare
- Once the seeds have germinated move to a really light position; if they are on a windowsill turn the tray around every day so that they grow straight.
- Keep the compost just damp by standing in a tray of lukewarm water for a couple of minutes. If it gets too dry it can form a crust on the surface which the seedlings will find impossible to penetrate.
- Water in the morning so they are not stood in cold sodden compost overnight.
- Don’t water over the top of the seedlings as this can result in the formation of grey mould.
- Prick out the seedlings into individual cells when they have formed 2 pairs of leaves; gently hold them by the leaf, they can grow a new leaf but won’t grow again if the stem snaps.
- Keep the seedlings well-spaced to improve airflow and reduce the risk of grey mould.
- Keep the seedlings indoors until the days have warmed up and they are ready to be hardened off.
- Harden off when all threat of frost has gone by putting outside in a sunny spot for a couple of hours a day, bringing them in at night, until they can stay outside.
- You can plant them outdoors before the frosts have finished provided they are covered in a fleece cloche.
Problems
- Botrytis cinerea (grey mould); this is caused by the compost and/or seedlings being too wet and cold, and the water not evaporating due to poor airflow if they are too close together. Once you have it there is no cure, throw the compost and seedlings into the grey wheelie bin and disinfect the seed tray.
- Over-watering; leads to the seedlings rotting.
- Under-watering; results in a hard crust forming on the surface that the seedlings cannot penetrate.
- Temperature too cool; this will result in the seeds not germinating.
- Not enough light; results in the seedlings becoming weak and leggy when they should the stocky and sturdy. If they are weak they are more susceptible to mould and aphids.
For more information on how to grow seeds please click here